Tuesday, December 3, 2013

Best Thai Salad Ever

This is the best salad ever! It is so tasty, healthy and delicious. It takes a while to get all the veggies ready but it is a very simple recipe.  Try changing out the chicken for shrimp, pork or beef!


What You Need
Makes 4 servings

Salad
2 Boneless, Skinless Chicken Breasts or 4 Chicken Tenderloins
1 tsp Chinese Five Spice
3 Small Lettuce Heads , Chopped
1/2 Head of Cabbage, Chopped
2 Carrots, Peeled and Shredded
2 Green Onions, Chopped
1 cup Bean Sprouts
1/2 Cucumber, Peeled and Chopped
1/2 Bunch of Cilantro, Chopped
1/2 cup Peanuts, Chopped
3 tbsp Olive Oil
1 tbsp Sesame Seeds
1 Serving Ramen Noodles, Dry

Salad Dressing
1/4 cup Rice Vinegar
1/4 cup Thai Sweet Red Chili Sauce
1/2 tsp Sugar

Peanut Sauce
1/4 cup Peanut Butter
1 tbsp Soy Sauce
1 tbsp Rice Vinegar
1 tbsp Thai Sweet Chili Sauce
2 tbsp Water


What To Do

Step 1: Prepare all of your vegetables (wash, peel, chop, etc). Place in a large bowl.


Step 2: Season chicken with Chinese Five Spice. Cook on medium heat until fully cooked. Chop up chicken. Set aside.

Step 3: Heat up the olive oil in a pan on medium-low heat. Once hot add the ramen and sesame seeds. Stir continuously until golden brown (about 5-10 mins).

Before

After

Step 4: Make the salad dressing. In a small bowl or liquid measuring cup add the rice vinegar, Thai sweet red chili sauce and sugar. Mix well with a fork.


Step 5: Make the peanut sauce. In a small bowl add the peanut butter, rice vinegar, Thai sweet chili sauce and water. Mix with a fork or whisk for about 5 minutes. It will start to look stringy (see below) but after a few minutes it should become smooth and creamy. If it appears too liquidy, even after several minutes of mixing, add a little more peanut butter. Stir until creamy and uniform.
Before
After


Step 6: Toss the salad, chicken and salad dressing together.


Step 7: Plate out each serving. Drizzle peanut sauce, chopped peanuts, ramen and sesame seeds over each serving. Enjoy!


Sunday, December 1, 2013

Alternative Use Holiday Center Piece

This is a great alternative use for a cake stand. Pile some ball ornaments onto the cake stand and you have a great holiday center piece!


Quick and Tasty Homemade Green Salsa

I generally don't like salsa but I love this one!  It's a twist on a recipe a friend taught me. I make it mild but you can always add more jalapenos or a habanero to spice it up! 


What You Need

5 Tomatillos
3 Garlic Cloves
2 Serrano Peppers
2 Jalapeno Peppers
1/2 of a bunch of Cilantro
1 tbsp Lime Juice
Pinch of Salt


What To Do

Step 1: Cut the tomatillos and peppers in half. Remove the seeds and veins from the peppers. Place face down on a baking sheet with the garlic cloves. 


Step 2:  Place in oven on Broil for 5-10 minutes or until brown and softened (see picture below).


Step 3: Place all the ingredients in a blender or food processor. Blend until liquefied. Add extra salt and cilantro to taste. Enjoy!

Wednesday, October 16, 2013

Spinach Dip Pizza

I saw a recipe on Pinterest for spinach mascarpone dip. It looked delicious but I was feeling like pizza. So, I decided to combine the two. I added sausage, mushrooms and sun dried tomatoes as the toppings.  It was delicious, very filling and made me feel healthier with all of the spinach :)


What You Need
Makes 2-3 servings

1 Pre-Made Pizza Dough (I get mine from Trader Joe's)
2 Chicken Sausages
1/4 cup Sun Dried Tomato
4 oz Sliced Mushrooms
6 oz Mozzarella Cheese

Spinach Dip
2 cups Shredded Spinach (you can use frozen or fresh)
4 oz Mascarpone
1/3 cup Grated Parmesan Cheese
1 tbsp Crushed Garlic
1 tbsp Olive Oil
Pinch of Nutmeg


What To Do

Step 1: Follow the directions for your pre-made pizza dough to prepare the dough.

Step 2: While the dough is cooking, heat the olive oil and garlic in a large pan. Add shredded spinach, cook until wilted. Remove as much access liquid from the spinach using a cheese cloth or dish rag. Place spinach back in pan. Turn heat to low and stir in mascarpone until fully melted. Add a pinch of nutmeg. Then add Parmesan cheese, stir until melted. Take off heat and set aside.
*If you are using frozen spinach, remove access liquid from the spinach prior to cooking.


Step 3: Cut sausage into 1/4 inch slices. Cook the sausage until golden brown.


Step 4: Top pre-baked pizza dough with spinach dip, mushrooms, sun dried tomatoes, sausage and cheese.


Step 5: Cook at 350° until the cheese has melted and starts to bubble (about 20 minutes). Enjoy!


Tuesday, October 1, 2013

Breaking Bad Finale Party


Breaking Bad was such a great show we had to let it go out with a bang! So we threw a Breaking Bad Series Finale party. It included roof pizza, Los Pollos Hermanos, blue margaritas, blue sprinkle cupcakes, Breaking Bad cookies (courtesy of a friend), Schraderbrau and of course some crystal blue persuasion. Although the finale is over, I am sure there will be a lot of people dressing up as their favorite Breaking Bad character this Halloween. What would go better with your costume then some homemade blue "meth". So here is how I made the delicious homemade Heisenberg Sky Blue (candy of course)!


What You Need
3/4 cup Light Corn Syrup
1/2 cup Water
2 cups Granulated Sugar
10-15 drops of LorAnns Flavoring (I used cotton candy)
Wilton Sky Blue Coloring
Cooking Spray
Baking Sheet (with an edge)
Aluminum Foil
Mallet or Meat Tenderizer
Candy Thermometer
Stainless Steal Pot


What To Do

Step 1: Line the baking sheet with aluminum foil. Spray with cooking spray to prevent the candy from sticking.


Step 2: Add the the corn syrup, water and sugar to the pot. Cook on medium heat. Stir occasionally until the sugar dissolves and the liquid becomes clear.
*It is easy to get it boiling before you see this happen. Once it starts boiling it should be clear but check before going on to Step 3. Use a spoon to bring up a little bit of the liquid to check for clarity.


Step 3: Insert your candy thermometer into the pot and turn up the heat. DO NOT STIR. You want to get the candy to 285°. Keep an eye on the pot. It will take a bit to get going but once it does it will hit 285° fast. Once you get it to 285° turn off the stove and remove the pot from the heat immediately.


Step 4: Once there are no more bubbles forming in the pot add the flavoring. LorAnns is 3-4 times stronger then normal flavoring so you don't need a lot. Add 10-15 drops (depending on how strong you want the flavor to be).

Step 5: Dip a toothpick into your coloring. Place the toothpick in the pot and stir it around a few times. Remove the tooth pick and stir with a spoon. Make sure to fully incorporate the color or there will be streaks of color in your candy.
*Work quickly at the point, the candy starts hardening fairly quickly once it's off the heat.

Step 6: Pour the liquid candy mixture on the baking sheet. Rotate the baking sheet to even out the liquid. Let sit for 30+ mins so the candy can fully harden.


Step 7: Break Bad! Smash the candy with the mallet. Once you have reached your desired piece size, place into small baggies and Enjoy!


Friday, September 20, 2013

Prosciutto, Brie, Fig and Arugula Sandwhich

I had this sandwich at a restaurant recently. Since the restaurant isn't very close to my house I figured I'd try recreating it at home.


What You Need

Soft Baguette
Brie
Fig Jam
Prosciutto
Arugula


What To Do

Step 1: Cut the baguette to the length desired for you sandwich. Then cut that piece in half.

Step 2: Spread fig jam on the inside of half of the baguette piece.

Step 3: Cut enough slices of brie to cover the other half of the baguette piece. If you are using a softer brie you can just spread it on.

Step 4: Add prosciutto and arugula.

Step 5: Enjoy!


Baked Homemade Potato Chips

These are quick, easy, and healthy! It is a great use for those last few potatoes in the bag or ones that are about to go bad. 

What You Need
Makes 2 servings

2 potatoes
Season All
Olive Oil


What To Do

Step 1: Preheat oven to 325°F. Peel potatoes. Slice potatoes very thin (about 1/16 of an inch). I highly suggest using a mandolin. It will go much quicker. If you don't have a mandolin you can always use a knife. 


Step 2: Place all the potato slices in a bowl. Drizzle a little olive oil them, then sprinkle with season all. Mix well. Repeat 3 times or until all chips are lightly coated.


Step 3: Lay out potato slices on a baking sheet. Make sure they don't touch. Sprinkle on more season all if needed.


Step 4: Bake for 20-30 minutes or until golden brown. Watch them carefully! Once the liquid has cooked out of the potatoes they can burn quickly!


Step 5: Enjoy!


Spooky Halloween Frame


What You Need

Shadow Box
1 piece of Scrapbook Paper
Scrapbook Sticker Pack of Your Choice
Candy Corn


What To Do

Step 1: Remove the back of the frame. Cut scrapbook paper to the size of the inside of the frame. Make sure you measure twice to avoid cutting the paper too small.

Step 2: Add scrapbook stickers in the arrangement of your choice. Start at least an 1 inch or so above the bottom of the paper so you have room for the candy corn.

Step 3: Place the frame facing down on a table. Add candy corn. Place the back on the frame. Check the level of candy corn. Adjust candy corn amount until you have filled the frame to the bottom of your stickers.

Step 4: Display and Enjoy!

Halloween Mason Jar Monsters

This is so cute and simple! It's also a great kids craft.


What You Need

Mason Jars
Water Based Paint
Foam Brush
Small Paint Brush


What To Do

Step 1: Using the foam brush, paint the inside of the mason jar with the color of your choice. You will need to do at least 3-4 layers to fully cover the inside of the jar.

Step 2: Using  a small paint brush, paint the monster face of your choice on the front of the jar.
*To make the bolts for the Frankenstein monster: Using pliers to get a good grip on the metal, unscrew the metal pins of 2 push pins. Hot glue the plastic portion of the push pins to the side of the mason jar. Paint black.

Step 3: Display and Enjoy! 
*You can also add a candle to give your room a spooky glow!


Fall Wreath

Quick and simple fall wreath.


What You Need

8" Grapevine Wreath
4 Fake Flowers
3 Fake Leaves
1 Bow or Ribbon
Hot Glue Gun
Hot Glue


What To Do 

Step 1: Remove fake flowers from their stem. They should just pull right off.

Step 2: Hot glue flowers, leaves and bow onto wreath.

Step 3: Hang and Enjoy!

Wednesday, September 18, 2013

Halloween Wreath

Cute and spooky Halloween wreath!


What You Need
8" Foam Wreath
1 package of Black Felt from Michael's
150+ Pins
Cobweb
Decorations (I used Halloween colored balls and spiders)


What To Do

Step 1: Cut felt into 2" x 2" squares.

Step: Pin the squares to the wreath. Make sure it is tight enough that you can't see the wreath underneath. Cover wreath, leaving the back opened so it lays flat against the wall. Make sure to cover the wreath thoroughly so you can't see the foam wreath when it hanging.

Step 3: Cover with spider web and decorations.

Step 4: Hang and Enjoy!

Friday, September 13, 2013

Watermelon Cocktail

A refreshing cocktail on a hot summer day!

What You Need
Makes 2 cocktails

1 1/2 cup Cut Up Watermelon 
1 cup Lemon/Lime Soda
4 oz Vodka (this ingredient can be skipped to make a kid friendly version)


What To Do

Step 1: Add all ingredients into a blender. Blend well.

Step 2: Strain cocktail mixture with a fine mesh strainer. 

Step 3: Pour into a glass, garnish with a lime, and Enjoy!


Sunday, September 1, 2013

Strawberry Sorbet

I was at a farmers market last weekend and got a free bag of canning berries. I don't can but I do make sorbet :). The berries were bruised and a little smashed. They turned out to be perfect for sorbet.

What You Need

6 cups Fresh Strawberries
1 1/4 cup Simple Syrup
1 tbsp Lemon Juice
1 shot of Vodka (optional)

Simple Syrup
1 cup Water
1 cup Sugar

What To Do

Step 1: Boil the water and sugar together on Medium to Medium/High. Stir frequently. Once the sugar has completely dissolved, remove from heat. Pour the simple syrup into an ice bath. Stir occasionally until it has cooled or the ice has completely melted. Then place in the fridge until completely cooled (at least 1 hour). 

Step 2: Place strawberries in a food processor. Once completely pureed, add the lemon juice, 1 1/4 cup simple syrup and the vodka (optional). The vodka helps smooth out the sorbet and helps prevent ice crystals from forming. I find using it makes a big difference in the final consistency. Place the mixture into the fridge until completely chilled (if your strawberries were stored in the fridge go straight to Step 3).


Step 3: Place the mixture in an ice cream maker. If you do not have an ice cream maker you can place the mixture straight into the freezer. Once you have reached your desired consistence you are ready to Enjoy! 


Up-Cycled Jewelry Box

I got this jewelry box several years ago as a gift. I really like it. It is very functional but I wanted something that matched our furniture better. So I decided to give it a little update.


Thursday, August 29, 2013

Homemade Flour Tortillas

We go through a lot of tortillas at my house. I hated needing them for dinner, not having them on hand, going to the grocery store to get more and finding them not on sale. I figured there had to be an easy way to make tortillas at home. I found this recipe and tweaked it a little to work better for me. They are super tasty and easy to make!

What You Need
Makes 12-14 tortillas

3 cups Flour
1 cup Hot Water
1/4 cup Vegetable Oil
2 tsp Salt
2 tsp Garlic Powder


What To Do

Step 1: Combine all dry ingredients into your mixer. Add the oil, then slowly add the hot water. Mix until thoroughly combined.


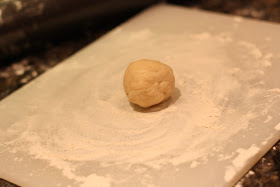
Step 2: Flour the surface you are going to be rolling your dough on. Make a 2 inch ball out of the dough. Gently flatted the ball with you hand. Roll the dough until it is 1/4 inch thick and 6-8 inches wide. Repeat until all of the dough has been used. *You can cook the tortillas as you go or place them on Saran Wrap, alternating between Saran Wrap and precooked tortillas. I generally will cook them as I go but end up rolling them out faster then they cook. So I end up having a backlog in Saran Wrap.


Step 3: Cook the tortillas on Medium heat until browned on both sides. Store in a tortilla warmer until you are ready to serve them. Enjoy! *Tortillas will be good in the fridge for about 5-7 days or go to Step 4 for a bonus recipe!


Step 4: Use your leftover tortillas to make tortilla chips. Preheat over to 350°. Cut tortillas into triangle pieces (about 8 per tortilla)Place on a baking sheet, making sure they do not touch. Salt if desired. Bake for about 10 minutes or until slightly browned. Enjoy! *They are also great as an alternative to pita chips! I enjoy mine with humus.